Wednesday, June 29, 2011

Welcome to Skitzo Leezra's New Studio


Greetings to all you Anonymous Craftaholics out there in the Intranet! Linda checked out my craft room pix on the Skitzo Leezra Studio blog and flickr photos and saw my old craft room but meanwhile, I was expanding and growing to a bigger craft room studio.

It began with a box under my bed and grew to an entire room dedicated to craft, but always with organization as key. With a handful of Lowe's gift cards, a rough graph paper draft and a love of organization, my 10' by 12' craft room evolved to a 21' by 14' studio.

Plan your work, work your plan. It's all about space planning, people!


Using things for other than their intended purpose, that's me! Metal gutters become ribbon storage and an old library card catalog holds embroidery floss and beads.


Creative storage solutions? How's about storing sewing notions in these old (antique?) enamelware refrigerator boxes glommed from my mom's stash?

(Who doesn't love a label maker?)

Thanks for checking out my craft studio and here's hoping you carve out your own happy place. Check out my other postings for more details and some how-tos or "tutorials" as craft folk call them.


Play that funky music, frog boy!
We gotta get our craft on!

((HUGE thanks to Linda
for inviting me to hang out with you!!!))

Tuesday, June 28, 2011

I got you pegged


Not gonna lie, my fabric covered peg board is something to behold.
AND, I'm gonna tell ya how to make one for your very ownself.

Materials needed:
  • pegboard
  • frame
  • spray adhesive
  • fabric, wrinkle and crease free
  • scissors
  • iron
  • pegboard hooks
  • awl
Find a frame.

Purchase some pegboard at a lumberyard or Lowe's or Home Depot. Or totally luck out like me (because People Give Me Stuff) and snag brother-in-law's leftover pegboard material.

Cut pegboard to fit inside your frame. (Don't install pegboard into frame yet.)


Walk yourself outdoors with a can of spray adhesive. Spray the pegboard with adhesive.

Carefully smooth your fabric over the tacky pegboard. Get it right the first time because there isn't much forgiveness between the fabric and glue. Trim excess fabric.

Install the pegboard into your frame. Stand in awe of your near wonderful creation.

Install two Gorilla hooks to balance and level your framed pegboard.


Now we're getting to the fun part. Drag a finger across the fabric to select a pegboard hole. Grab your handy awl and gently poke through the hole. Aggressive poke-age will result in stretched and unfortunate fabric puckering.


Insert a pegboard hook.


Start filling that mutha'!


Don't forget to add a disco ball, fool!

With remaining pegboard material,
I repeated the procedure for
three smaller framed pegboards.


You like?

Thursday, June 23, 2011

Inch by inch


My good buddy Elizabeth picked up this cool yardstick thing at a yard sale. She knew I would love it and she was, as the French would say, "correct".


Look at it installed on my wall.
Woo Hoo!
Merci beaucoup, E!

Wednesday, June 22, 2011

Feline helper

Maybe Sammy thought the frames would blow away.

Or perhaps 3 wooden frames are more comfortable than carpet.

Meet my furry assistant.

Monday, June 20, 2011

Never underestimate the power of whimsy

Perhaps your craft room doesn't include the following but why the hell not?

anthropomorphic kitties

disco ball

boombox toting frog

lava lamp

a visual reminder
to get the finger outta your ass
and make something!

Saturday, June 18, 2011

She's right

Yesterday, Kristie left a comment that included the following:
Congratulations on what must feel like Utopia to you now.

What a generous thought.
Thank you, Kristie!
You're right, it is my own "happy place" and I'm gratified the picture in my head now matches the new studio down the hall.
It's been a fun project and it's nice to have ya'll check it out.
'Preciate your interest!

Watch yo' shelf


While mapping out the room, I decided match the shelving depth to the 24" work surfaces for a more cohesive look.
Edsal shelves were on sale at Lowe's so two went home with me. Metal posts and shelves were spray painted ivory to coordinate with the purposely neutral walls and floor. The wood shelf inserts were black and not raw wood as shown online or on box. Woozy from spray paint fumes, I opted not to paint the shelves.


Word to the wise: have a buddy assist when assembling. The pieces aren't heavy but must be level.


The posts and supports are metal thus magnet backed glass top boxes are perfect storage for extra needles and such.

WooHoo! It's time to fold some fabric and sort and alphabetize it accordingly.

Friday, June 17, 2011

I am floored

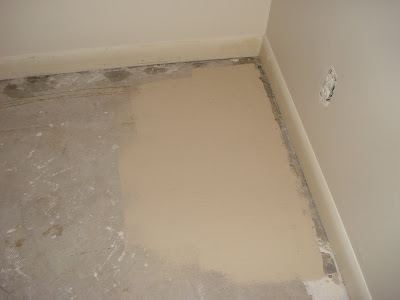
Check out the tile I used on the floor of the Skitzo Leezra Studio. After ripping out the carpet, the cracks were filled in with a tube of grout. (The grout in a tube is better than the grout in a plastic bottle.)


Oh wait, I forgot to buy tile.
Nevermind, let's paint the floor instead.
You heard me.
Valspar Latex Porch & Floor paint.
This stuff dries super fast. Woo Hoo!

Lines drawn with pencil.
Determine the center of the room.
Draw lines out from there.
Believe or not,
my line placement is near perfect.


Get this, two visitors touched the floor to make sure it wasn't genuine ceramic tile but it was way faster, super easy, way less expensive.

Let's start loading the room.


Thursday, June 16, 2011

Starting at the top


Okay, the carpet was gone. Room emptied. If there was a time to scrap the the nasty ass cottage cheese ceiling, it's now.

Man, oh, manoshevitz, how I wish I could meet the guy who invented that textured shit. It would be a serious ass kicking for sure. Maybe not, I've never had a physical fight but I can guar-damn-tee ya, it would at least warrant a windmill swinging and slapping of arms and hands.

Anywho, here's how get rid of the crud.
Get yourself a sprayer. Big but not too big because water is heavy, don't ya know. Lay down some plastic.
Spray the ceiling. Spray it again. Try a scrape. If it releases easily, get to it, be-yotch. If it doesn't, spray it again. When your fabulous sister and wonderful mom come over to help, restrain yourself from weeping from joy.

Scrape it, patch it, prime it and paint it.
Slap up a cool light fixture (Lowe's) on it and toss some shiny stuff on that.

More is more, I say.
Of course
it needed a disco ball.

Wednesday, June 15, 2011

How it started


Late one Sunday night I realize I'd forgotten to put fresh sheets on the now stripped bed. Too lazy to remake my bed late at night, I decided to sleep in the guest room.

"What a cozy room," I thought to myself. It felt better than my much larger bedroom. Build a ginormous house with super high ceilings and note most folks will congregate and linger in a smaller room with a lower ceiling. It's an animal cave-like anthropological type thing. Anywho, I realized I never liked my bedroom because it was simply too large. Furniture had been brought in, rearranged, switched, etc but it never felt right.

All I did in there was sleep anyway . . . why not switch rooms? The guest room could become my bedroom, my craft room, the new guest room and my big bedroom would be the newly expanded Skitzo Leezra Studio!

The room was quickly measured and I began to graph out the new project. Holy guacamole, the current craft room was overflowing and could be consolidated in the larger studio! I could barely sleep that night in anticipation.

The next day I emptied my bedroom and ripped out the carpet . . . .

Tuesday, June 14, 2011

Skitzo Leezra's New Studio

WooHoo!

The new and expanded Skitzo Leezra is being unveiled! It's been months in making and I am ready to share photos and how-tos from painted floors to fabric covered peg boards.

Take a look at a few sneak peek photos and check back for detailed tutorials and ideas.

The Master Plan

Ribbon Gutters make an appearance

Gotta be organized!

You label me, I label you